Showing posts with label flair. Show all posts

Tuesday, December 29, 2015

Christmas Tags -- full disclosure


I think I'll start off with the full disclosure... I had a really great class this last November with the local group of girls based on 12 tags of Christmas using my Yuletide collection through 7 Dots Studio. I had really great intentions of offering the class online via video access and optional kit purchase. I had filmed all the videos and was ready to edit when my tablet decided to stop working. EEK. 

I tried a few different things to get it back up and going and it still might happen... but now the time has run out and we're four days PAST Christmas. So... instead of offering a class I will put up all the info in this post about the tags! YAY! :) 


I will be offering another set of tags via class in a Valentine's LOVE theme. I DID get a new tablet and should be able to move forward easily from here. I apologize to those of you who were waiting for the Christmas tags, but here's to other stuff soon! 

Now ---- onto the tags!


The base for all 12 tags (as mentioned before) is Yuletide -- my fun Christmas collection for 7 Dots Studio. I also used three white tags of watercolor paper. All tags have been cut using the #8 tag die by Tim Holtz / Sizzix. I will link all products that I can via each tag below, but I've also used Ranger's Stickles, May Arts Ribbons, UmWowStudio chipboard, flair and stencil, Viva Las VegaStamps! rubber stamps, threads, inks, fabric, doilies, watercolor, cheesecloth... and more. <3 Some of the products from UmWowStudio were new... and as the year sort of got away from me, they'll be available next year.


The first tag (and my favorite!) was cut from Gingerbread and layered with strips of muslin. Hint : I tear my muslin for the great vintagey raggedy edge it gives. There's also a layer of cheesecloth that has been distressed by pulling the fibers apart. The chipboard rocking horse is the same shape as UmWowStudio's Rocking Horse, but has been scaled down. They'll be available next year in a multi-pack. It's been stamped with the Sheet Music BG from VLVS! and distressed with Ranger's Walnut Stain distress ink. I tied the whole tag with some May Arts Burlap twine and a vintage shell button.


The second tag was cut from Figgy Pudding. It's been stamped with the Skyline Silhouette and Sky of Stars Background stamps, both from VLVS!. I do the majority of my stamping in Archival Ink BLACK by Ranger. The tag has been outlined with a permanent black pen and tied with May Arts Burlap Twine. Hint : When drawing a border, draw one line from top to bottom... and then again from bottom to top. It will keep your line purposely playful without much work. As a final bit o' goodness I used a sentiment sticker from Yuletide.


The third tag was cut from watercolor paper. I loved the stark white contrast against the distressed bits of the other tags. It made a great compliment! I also incorporated a bit of vintage text paper and a paper doily. The chipboard zigzag shape is from the Floral Collection chipboard set by UmWowStudio. The flair is also from UmWowStudio... from the matching Yuletide products : Yuletide Flair. I stamped the Large Bird Flying Left from VLVS! to tie up the whole bit.


The fourth tag was also cut from Figgy Pudding.. this time the green side. The tree was cut from vintage sheet music by hand. Hint : Don't be afraid of doing things by hand... it makes them feel more personal. The tree was glued with UHU and topped with some distressed May Arts Crochet ribbon and some baker's twine. I used a black pen to draw the border using the same tip as before.


#5 was cut from Mistletoe. It's been layered with a paper doily, a strip of wood from the Chestnuts paper, and a chipboard word. UmWowStudio will be doing LOTS of words from here on out! Hint : Your tags don't have to be FULL of product, leave a few a little bit more sparse. The contrast will make the whole set read wonderfully.


#6 is back to watercolor paper.... and I used watercolor paints on it this time, too! I used a really great pan set from Grumbacher. First I stamped in watercolor using the Numbers Set from VLVS!. Hint : when stamping in thinner things like watercolor paint, mists, etc... dip your stamp into the liquid, then blot once on a scrap of paper. From there your stamp should produce a more clear image instead of little blobs. Then, using the same watercolor, I swiped it across the middle of the tag. There's a bit of layering with some more distressed cheesecloth and a piece of flair from the same Yuletide set as before.


Tag #7 was cut from the backside of Chestnuts.. a nice deep red. The background has been stamped with the Music Sheet Background in various places. I created a hill using some white cardstock and gesso. While the gesso was still wet I dipped it in some nice chunky glitter. The trees are from the Yuletide MASH set by UmWowStudio. The star is also from UmWowStudio, but the Sketchy Stars set. The trees were treated the same as the hill. I also trimmed up the bottom of the tag with some handmade scallops and vintage book text. Hint : scatter in pieces from the other tags to make the whole set coordinated. The J O Y are alphas from Tim Holtz, and the tie at the top of the tag is another piece of torn muslin.


Whew - making pretty good headway here. The 8th tag was cut from Chestnuts. The pretty pattern in the background comes from the Flurries stencil by UmWowStudio. I used a nice heavy gesso through the stencil. After it was dried I tied a huge bow out of May Arts ribbons and wrapped it around the bottom. I also glued some Jingle Bells to the end of the big bow. 


Tag #9 is clean and simple in the most perfect way. It was cut from the Warm Cider sheet. Because it has the big thick stripes I felt it didn't need that much more. I started by drawing the border again. Then I watered down some gesso and splattered it across the background. Hint : Use a smaller brush to splatter.. it's easier to load up and drop from without wasting product. Sweater Weather is a fun stamp I designed fro VLVS! last year. The chipboard snowflakes come from the Yuletide Mash by UmWowStudio and the tag has been tied with a fun t-shirt type yarn.


Tag #10 was also cut from Warm Cider, but this time the back. This chipboard piece is a brand new one that will debut next year from UmWowStudio : a miniature Holly Vine. The vine has been covered in gesso and glitter... and the berries covered in Ranger Stickles. Then it was layered with distressed cheesecloth another piece of the Yuletide Flair set. Hint : Move your embellishment clusters around the tag. You don't always have to work in the middle or the bottom. I worked the top of this tag and the result is awesome.


Tag #11 is cut from Figgy Pudding. The top has been embellished with a paper doily and a Junque bow made from scraps of May Arts ribbons. I learned about Junque bows from the talented Margie Romney-Aslett! The giant chipboard star is from the Yuletide Mash and has been covered in gesso. Hint : create depth with dimensional adhesive. I layered up the two parts of the snowflake and the adhesive with a piece of Tissue tape and paper scrap. The paper has been punched with a Martha Stewart border punch.


The final tag, cut from watercolor paper, has also been punched with the border punch. Then it was backed with a scrap of red paper. I wrapped some red twine around the center of the tag and layered up a scallop circle cut from sheet music. There's a ring of May Arts Burlap twine and the chipboard Elk Head from UmWowStudio's Yuletide Mash. The tag was finished with Ranger's Stickles and May Arts ribbon.


WHEW >>> Did I miss anything? Let me know if you have any questions! I look forward to the next set of tags... and them working out for a class! ♥

Friday, July 31, 2015

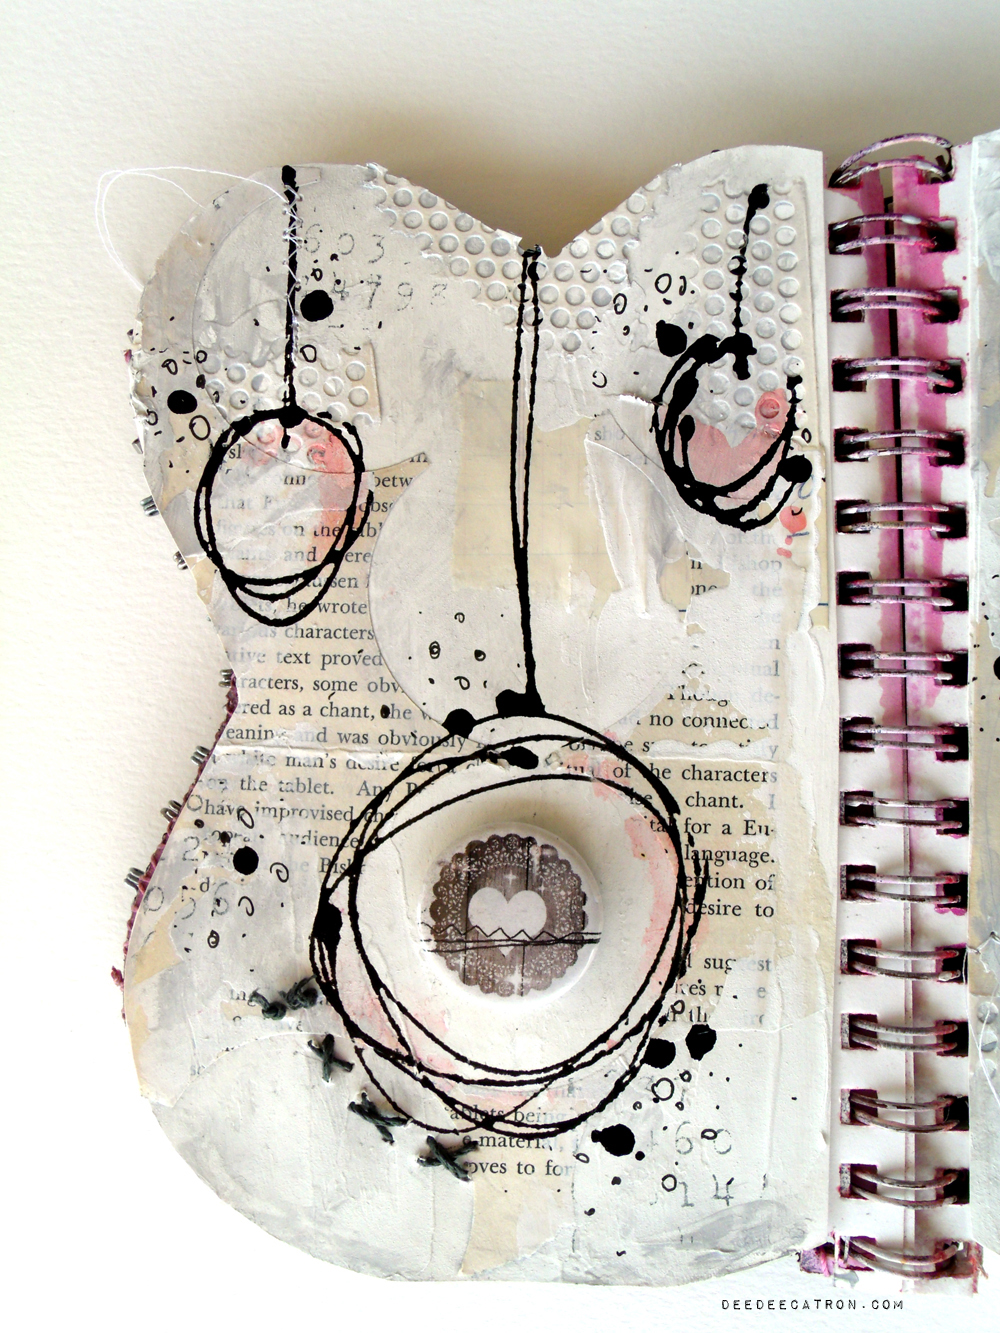
Allure {Art Journal Spread}

Today I am sharing a double page spread in a traveling art journal. I participated in a journal swap a few months back and I sort of dropped the ball on a couple of spreads... well I'm playing catch up and trying to make it up to those lovely artists... so here is one spread I finished up and mailed out this AM. 


The shape of the journal was a neat change in my routine.. curvy delicious sort of butterfly shaped pages. Each journal was themed, and this one said Madame X on the front.. it had a really gorgeous sort of corset stitch closer and some heart dangle beads. Add that to the few who had worked in the journal before me which gave me this sort of pink stripe in the binding.. and I knew the direction I was headed.  I promise you there is A LOT of beauty in these pages.. and the closeups show you tons of texture, layering, and lots of really great techniques have been utilized to complete this spread. SO... Here they are! 


The Left Page


The Right Page


The background is made up of vintage ledger pieces and old book pages that I had previous diecut for other projects. Never throw out anything right? I love the ledger paper with the vintage #s in this photograph. It's such a beautiful piece.


Here is more of that delicious ledger paper... YUM! I also layered up some drywall tape which has quickly become an absolutely favorite of mine. I adore the little perforation it has and the circles it adds to the background. All the background pieces were put down with Golden's Fluid Acrylic. Then I used Blick gesso to swipe and highlight areas of the background. It also camouflaged some of the hard edges from my papers. A bit of glazing was done with some gray paint and glazing medium.


I drew the lines and circles with a fineliner, golden fluid acrylic in carbon black and airbrush medium. There are drops and some hand drawn doodles, circles, and dots with a Sakura of America Micron pen. I also did a bit of lovely hand stitching using some super thick hemp cord in this beautiful charcoal color. Picked this up at Hobby Lobby. SO glad I did! The pink is from Tim Holtz's Distress Stain in worn lipstick. LOVE the sweet pink against the neutral background.


The flair (or button) is from a newer set at UmWowStudio called Noel. The colors fit perfectly with a brand new christmas lined I designed for 7 Dots Studio --- BUT it can be used out of context just as well. I loved the stitching that was it and it was perfect to mimic on the page. I also did some stamping in Gray Flannel by Memento with the new Numbers Set I designed for Viva Las VegaStamps!.


I ended up tearing out my pages, cutting off the scraggly binding part and then doing a bit of machine stitching to add more texture. I sewed in white to keep the contrast low. And finally.. this little bit of goodness that finishes off the page.. I recently got a stack of beautiful vintage dictionary pages and found this one quite relevant to the theme of this journal! The tone of it was very.. alluring! haha. First I used matte medium to put down some muslin, and then the dictionary page.. and finally all the machine stitching.


Sunday, March 29, 2015

Prima Marketing {March Special Delivery Box}

As a Prima Educator we get offered some really great opportunites... In the last week I got to play with some beautiful papers and embellishments via the Special Delivery MARCH kit from Prima Marketing. 

I chose altered item as my avenue of inspiration for everyone and when the box arrived and I started digging through all the delicious contents, I came across a box with a flip cover that housed cards. I had originally intended to alter something like a matchbox or spool.. but when my fingers flipped up the lid and there was a small pocket inside to house the cards.. my brain exploded! 

So I altered that beautiful packaging and it turned out like this : 

And here's the inside:


I also recorded the process then voiced over with details:


And here are some fun detailed shots:


The box has BEAUTIFUL depth:


 ♥

Friday, November 14, 2014

Oh Boy! {12x12}

I love sketches! You may noticed from our monthly challenge based on Sketches over @ UmWowStudio --- well recently I got the opportunity to join the fabulously talented sketch designer Kristine Davidson of Creative Scrappers with a whole slew of other layout artists in Version III of Creating With Sketches!

I cannot show you the sketch (of course) but I do get to share with you my layout based on the awesome sketch :) 


Product list:
Prima Marketing Ink : Color Bloom Spray | Junkyard Findings | Heavy White Gesso
Tim Holtz : Keyhole | Tissue Tape | Tiny Attacher and Staples
May Arts Ribbon : Burlap String
Other : sewing machine and thread, watercolor paper, cheesecloth, Dymo Label Maker, paper doily

There is TONS of inspiration in this bit! 120 Sketches, 60 Designers!

You can pick up the $10 DIGITAL version of Creating With Sketches here.
or the $18 PHYSICAL version of Creating With Sketches here.

And don't forget to use a coupon code :) 


Use coupon code V3DeeDee to save 10% !! :) :)

Friday, September 5, 2014

You Are Here {Art Journal Page}

Hellooooo sweet people who visit me :)

You may be aware, and my local friends will be, but each month, the first Sunday I hold an art journaling class at a local place called The Crafting Place. It's on Russell, right after Pecos. And the set up is pretty darn sweet. You bring your book, $10, and an open mind :) Then we go over some technique, product, or compilation of the two, and just have a grand ol 2 hours. well... I am trying to get better at two things.. 1) Sharing what we do in those classes (to a CERTAIN extent) and 2) be better prepared. So here I am -- showing you an art journal page that demonstrates the technique we'll be going over THIS Sunday :)

OH >>> And before I forget --- due to POPULAR DEMAND (um, YAY) we are changing the schedule for Art Journaling class a little bit... we'll now be meeting the 1st AND 3rd Sunday of every month! YAHOO! Twice the fun, twice the learning, one month. EACH and EVERY class will be different. So come on down!

We should get into it eh? Here's an art journal page titled You Are Here --- And Here Is GOOD>>


This page is really about capturing the great things that are happening for me this year. I was (am) playing with some of my favorite products, using some of my favorite techniques, and jotting down the things that make 2014 MY year.

A few glamour shots:


The supply list:
UmWowStudio Butterfly Kisses Flair
Viva Las VegaStamps! : Dictionary Page, Grungy 2, Grungy 0, Grungy 1, Grungy 4
StencilGirl Stencil
Lindy's Stamp Gang Magicals (Industrial Chic)
Heidi Swapp Arrow
Micron Pen
Dymo Label Maker
Gesso

Adventure is Waiting {A Donna Salazar Designs Mini Album}

Hello Hello friends!! I'm so excited to be over on the Donna Salazar Designs blog today! My first official post and I am SO SUPER ECSTATIC to be here sharing some inspiration with you. I kind of feel like we should JUMP right in. So onto my first project:


A MINI ALBUM!! :) :) My Sister is having a baby very soon, and I wanted to send a little something for her to show some encouragement and just let her know she can rely on me for things. I'm only showing the cover here.. but there are a couple sneak peeks over on the DSD blog of the inside pages :) 


DSD Products used:
Clearsnap - Mix'd Media Inx {Pewter} | Mix'd Media Inx Chox {Midnight} | Humor Cards
GCD Studios - Mix'd Media Stax 2
Spellbinders Dies - Creative Pages | Creative Page tabs
Zutter - Distrezz-it-all


Other:
UmWowStudio chipboard, flair and mask
7 Dots Studio Nature Walk collection
Viva Las VegaStamps! rubber stamps
May Arts Ribbons
thread, gesso, staples, epoxy stickers, adhesive, punches

Saturday, July 12, 2014

Us 3 {12x12 SATW | 7DS}

Today I've got a 12x12 to share with you as my first official project on the 7 Dots Studio team!


7 Dots Studio is a super sponsor over @ Scrap Around The World and today The 7Dots team is inspiring you on their blog using a superb mood board created by Tusia herself! 


I did a 12x12 utilizing a piece of paper from the 9th Wave Collection by Finnabair for 7 Dots Studio and a giant sheet of watercolor paper.


I trimmed off a 3inch piece of a sheet from 9th wave and adhered it down to my watercolor paper. Then I gessoed over the break in paper to help the two blend together, spreading the gesso out on the two papers. I layered up some background bits like coffee splatters and rings, mist splatters, and 2 favorites of my designs for Viva Las VegaStamps! (Invoice/waybill background and Clockface.)


This bit underneath the photo is comprised of a Nature Walk diecut tag, a big fussy cut Chevron from the Nature Walk Songbird sheet, some May Arts Webbing and Burlap string, and a tag reinforcement from UmWowStudio's Soar Tag Set. You can really see the texture of the gesso in this photo.


This little cluster at the bottom includes the Invoice stamping,  some layering of 9th wave Leaf diecuts using a Magnolia die, some Nature Walk diecut elements, and a Prima flower.


The date stamp is just from a date stamp where you can dial up the appropriate date. There's a paper doily, a piece from the Airmail Grid Pocket Chip, a piece from From The Heart flair, and the #3 tab from Round Numbered Tabs all by UmWowStudio. There's also a few more leaves from 9th wave.


I also layered up a large tag from Nature Walk, the punch label stickers from Nature Walk and some staples. You'll notice a few brushes of gesso and some more coffee splattering around to help the continuity of the page.

Sunday, January 26, 2014

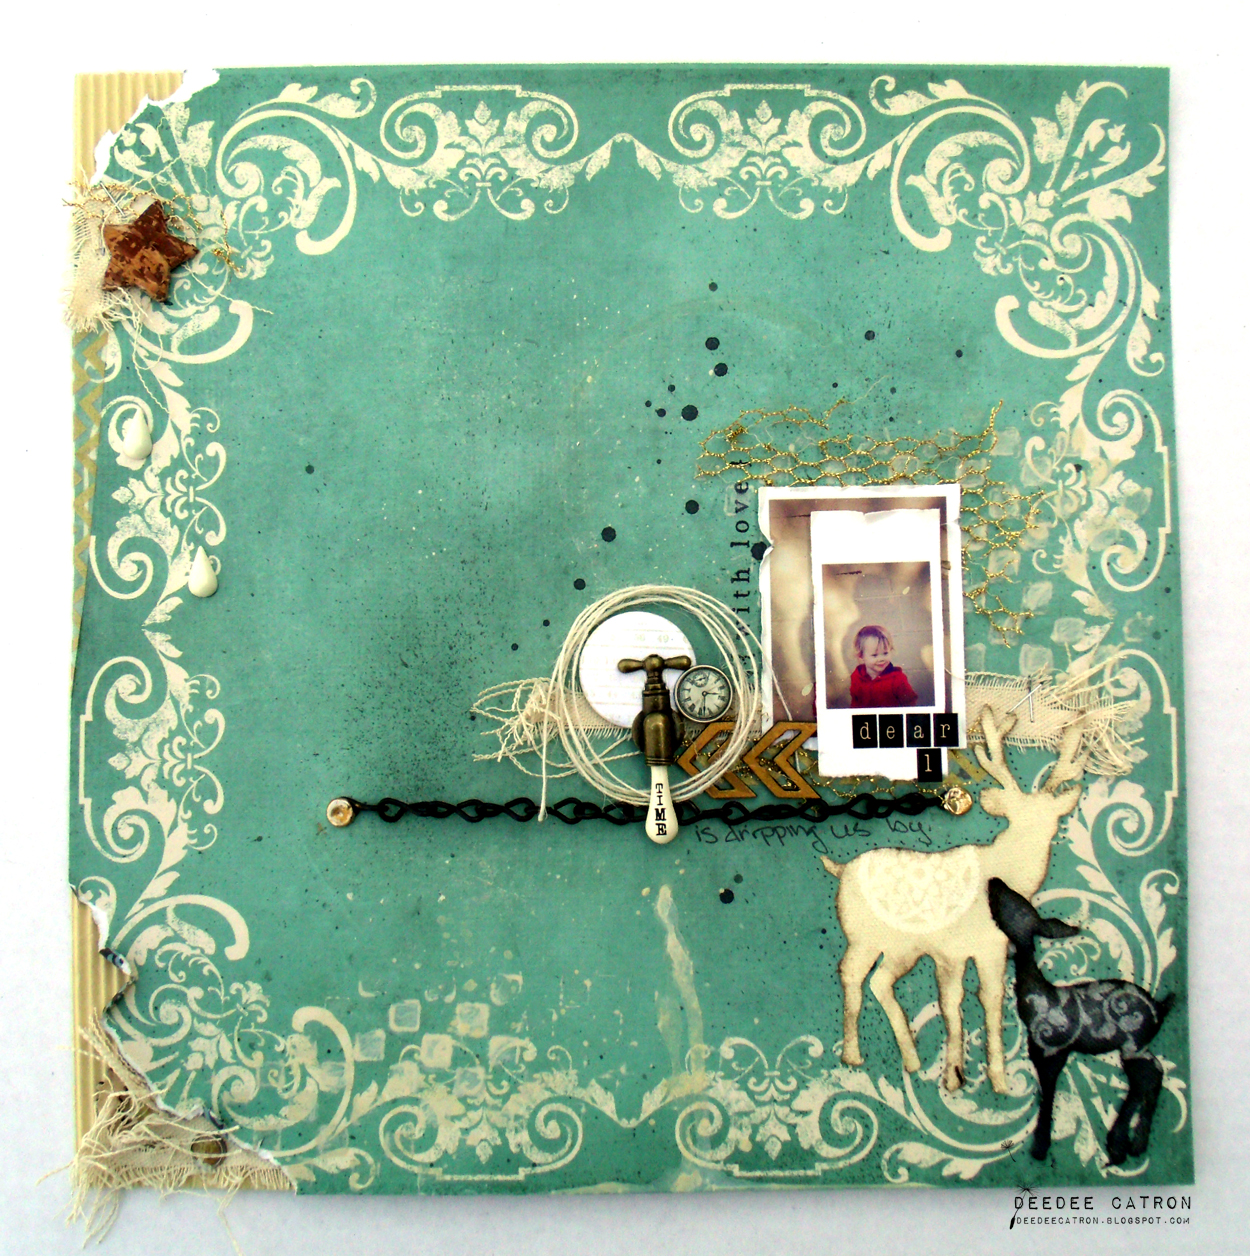
Dear 1 - Prima's Product Pick

Today I'm sharing with you a project inspired by Prima's Product Pick for January.


Glorious in blues and resin, fibers and some metal bits. I sort of went wild with this baby.

Here's my interpretation:

The base is from the North Country Collection my Prima, the flourishes are on the beautiful turquoisy paper. 


Here you can see lots of goodness! The Burlap Twine and Gold Net are both ribbons from May Arts. The Chevrons are from the Chevron Arrow and the Flair is from the brand new Moon Shine Flair, both by UmWowStudio. There's a piece of Prima Canvas torn in the background, accompanies by some Washi Tape from Gauche Alchemy. I've layered up some bits from Prima including a Junkyard Finding water tap, and an Engraver Brad. The { w i t h   l o v e } is by Viva Las VegaStamps! (my design!)

I love adding little details to corners and areas around the layout. I've ripped up this corner and tucked behind it a coordinating sheet of colored corrugated board. More ripped Prima Canvas and another Engraver brad. The stencil markings and splatters around the page are made with Distress Paint in Antique Linen. It's been used with the Checker Board Mask from UmWowStudio.

I love these two deer so much.. they come from one of Prima's Resist Canvas sets. One has been colored with Glimmer Mist in Charcoal and the other with the Antique Linen Distress Paint. Both are outlined in a dusting of Walnut Stain Distress Ink.
And finally the top left corner. Prima's Bark Stars and drips from the Junkyard Findings Taps, Prima Canvas, May Arts Golden Netting, staples and some Washi Tape from Gauche Alchemy.

Well.. that's all the eye candy I have for you today :) Thanks for stopping!