Showing posts with label ephemera. Show all posts

Saturday, January 20, 2018

Brush Strokes Origin - Our Mixed Media Moods

Welcome to OUR MIXED MEDIA MOODS!!!! We are SO GLAD to be back with you... shake off some cobwebs & get to work at our desks.


Jenn and I have been loving having fun with you. We adore sharing our experiences & knowledge with the world so when we had this idea it seemed perfect.. and IT IS!
Our Mixed Media Moods is a monthly collaboration between myself & Mixed Media Jenn where we pump up our youtube channels with high quality mixed media videos. Then.. we invite YOU to join us and link up below so we can visit your amazing responses! 


Occasionally we'll have some giveaways, prizes and guest artists joining us.. so please join our facebook group to see all the happenings! AND sign up for our newsletter for emails delivered directly to your inbox!


Jenn has worked up this incredible monochromatic mood board for us & of course I couldn't wait to get started!


OOOOOIE! I love this project! I really REALLY do! I hope you'll enjoy it as much as I do :)

Here is the VIDEO, followed by closeup shots, supply list, & Link up!
After you're done here on my blog, don't forget to pop on over to see Jenn's Post.


Supplies:
Plain Cardstock Uhu Adhesive (6 pk) : http://amzn.to/2FX6HwW Vintage Ephemera of all sorts Liquitex Gesso : http://amzn.to/2FUdyaC Quinacridone Nickel Azo Gold Fluid Acrylic : http://amzn.to/2FYAPYM Stabilo Marks All BLACK (12 pk) : http://amzn.to/2DsPgH3 Golden Fluid Matte Medium : http://amzn.to/2G08ktF (SOON TO COME DIGITALS TO UMWOWSTUDIO) Tandy Leather Needles : http://amzn.to/2Dm3Ko7 Snow White DMC Thread (12 pk) : http://amzn.to/2DT957v Singer Sewing Machine : http://amzn.to/2EZJWY7 Black & White Thread : http://amzn.to/2Dm8mKZ


Link UP :


Wednesday, June 21, 2017

LOST {ICAD 2017 #12}

Iiiiiiiiiiit's an ICAD!

Inspired by the beautiful colors Mixed Media Jenn always has in her projects AND accommodating the special request from Tracy <3 .. I've brought you a rainbow ICAD :)


Here's the video followed by closeups & the supply list:


My supply lists will start looking a little different from here on out! No more cute little photos, but everything will be there with names & links! Thank you SO much to everyone who purchases through links -- those help support my hobby and educational videos!

Index Cards (3x5)
Liquitex Gesso
1" Simply Simmons Wash Brush
Ranger Heat It Tool
UmWowStudio Dahlia Mandala
Set of Palette Knives
Golden Heavy Gel Matte
Dina Wakley Media (by Ranger) Heavy Body Paint in Ruby, Blackberry, Teal, Lime, Lemon, Tangerine
Posca Paint Pen (black)
Dina Wakley Media Blank Tape
Tim Holtz Paper Dolls
Tim Holtz Ephemera pack : Thrift Shop
Stabilo Marks All
Sharpie White Water-based Paint Pen
Dina Wakley Media Textures Stamps
Black thread, scrap chipboard
7 Dots Studio Dreamscapes Word Sentiments

Friday, October 9, 2015

Skull Maggots - day 9

welcome to my day 9 Friends!

After seeing my Ingredient Cards laid together yesterday and sort of stewing over how I'll be presenting them as a whole, I thought it would be good to add in a few cards with a bit less dimension. Hopefully my layered heart can get over it! :) so where today's project might not be very technique and or labor intensive, I'm still excited to show you the fourth of my Ingredient Cards... SKULL MAGGOTS :


dun dun DUN!!!!!!!! I love how it turned out :) And I feel like it could be the front of some funky 80's SciFi novel or something! The base is, of course, Canson watercolor paper. It's been layered with a trimmed down piece of patterned paper from my Destination Unknown line for 7 Dots Studio.


The Destination Unknown paper was trimmed down and then stamped with the Waybill/Invoice Background from Viva Las VegaStamps!. It was stamped in Ranger archival black, but to tone it down I dabbed the stamp on the ink pad and then blotted it on some scrap paper so that I was stamping with a ghosted image on the card background. It gave the card a great worn look. Then it was machine sewn to the card. 


I stamped the Elegant Lady Face from Viva Las VegaStamps! on bristol board in Ranger's Archival ink and fussy cut her out. Then.. I chopped off the top of her head! lol. The Detailed Brain was stamped on that same vintage book text I've been using for the ingredient cards. I trimmed it out also, then tucked it behind my Vintage Lady so that her brains are now exposed.


I glued everything down and then finished the card with the Skull Maggots stamp from last year's Halloween release. The Bristol board is proving great for stamping and really seems to hold up to wet glue, too. Believe it or not.. no UmWowStudio on this card. Sad right? haha :) 

Also please don't forget about the other participants on this journey. Hop around, leave comments, and be entered to win:
Terra
Black Dragon
Alison
Julia
Lyneen
Kelli
Maureen
Sue
DominoART
Lost Coast Portal To Creativity
Susan
Sarah
Keren
Lisa F
Teresa
Fiona
Lisa H
Stampendous Stamps
Shell
Sarah S
Airless Chambers
Susan R
Dream In Darkness
De Stempelwinkel
Leslie Rahye
Kat
Rebecca
Lee
Suzi
Sara
DeeDee

Thursday, October 8, 2015

Cobwebs - day 8

Welcome to the second week and eighth day of 31 days of Halloween stamping! EEEEeeeEeeEEEeeeeEk!


I'm pretty pumped to still be hanging in there! :) Today I have for you a third ingredient to add to my ... hmmm ... shall we say Apothecary Cabinet? I have ideas forming in my head of how I'd like to display them all together... can you think of anything? At first I thought a book... but I want them all to be seen, so I've been scouring for a big vintagey frame to display them in.. :D Anyways.. Today I bring you... COBWEBS: 


Isn't it just DELIGHTFUL? I'm so drawn in by the gorgeous green! EEK. It's like POISON IN MY VEINS. The base is Canson Watercolor paper covered in Liquitex Basics paint... I applied it nice and thick with a credit card so that it could then be heated with a heat gun to get the texture. (If you're trying this technique and it's not working... you need more paint!) Then some glazing with Liquitex glazing medium and Golden Fluid Acrylic in Carbon Black. Last but not least for the background is a very thin scraping of Blick Gesso accentuate the texture.


I adhered a Spooky Branch chipboard piece from UmWowStudio as the base of the embellishing for my card. Just a little bit of wet glue and a few minutes will keep it in place. You may have noticed by now... I adore fibers and textures in my projects (and depth!) so I ripped up a bit of cheesecloth to represent a spiderweb and glued it down. The Cobwebs stamp from Viva Las VegaStamps! really ties the corner off (and my ingredient card of course!) well. 


I even stamped a heroically creepy spider in the background... the Spider on Web Line is from Viva Las VegaStamps!. All stamps are in Archival Ink by Ranger. I couldn't forget to put a little hanger on this card, so I got out some silk  May Arts Ribbons in gorgeous gray and gave the card a double hanger.


I finished the whole thing off with that same vintage book text that I included in my previous two ingredients. BOOM! Can't wait to have the whole set done. It's going to be a great little piece of home decor! 

AAAAAAAAAAAND >> Check out how cool they're looking all together:


Also please don't forget about the other participants on this journey. Hop around, leave comments, and be entered to win:
Terra
Black Dragon
Alison
Julia
Lyneen
Kelli
Maureen
Sue
DominoART
Lost Coast Portal To Creativity
Susan
Sarah
Keren
Lisa F
Teresa
Fiona
Lisa H
Stampendous Stamps
Shell
Sarah S
Airless Chambers
Susan R
Dream In Darkness
De Stempelwinkel
Leslie Rahye
Kat
Rebecca
Lee
Suzi
Sara
DeeDee

Wednesday, October 7, 2015

Bone Dust - Day 7

Whoop! One week in :) After yesterday's super fun ingredient bit... I took my idea to make a series pretty seriously. So be prepared for some super cool but spooky Witch's ingredient cards! Today I've got for you the key ingredient to every devilish concoction... BONE DUST:


The base is Canson Watercolor paper with a layer of that delicious vintage book text from yesterday's post. It's so fragile you can see all around the edges where it just starts crumbling. It's such a great thing to have in my stash! the book text has been adhered down with Golden Fluid Matte Medium. Perfect to preserve the look and feel of the paper but make it more durable and useable in my mixed media piece.


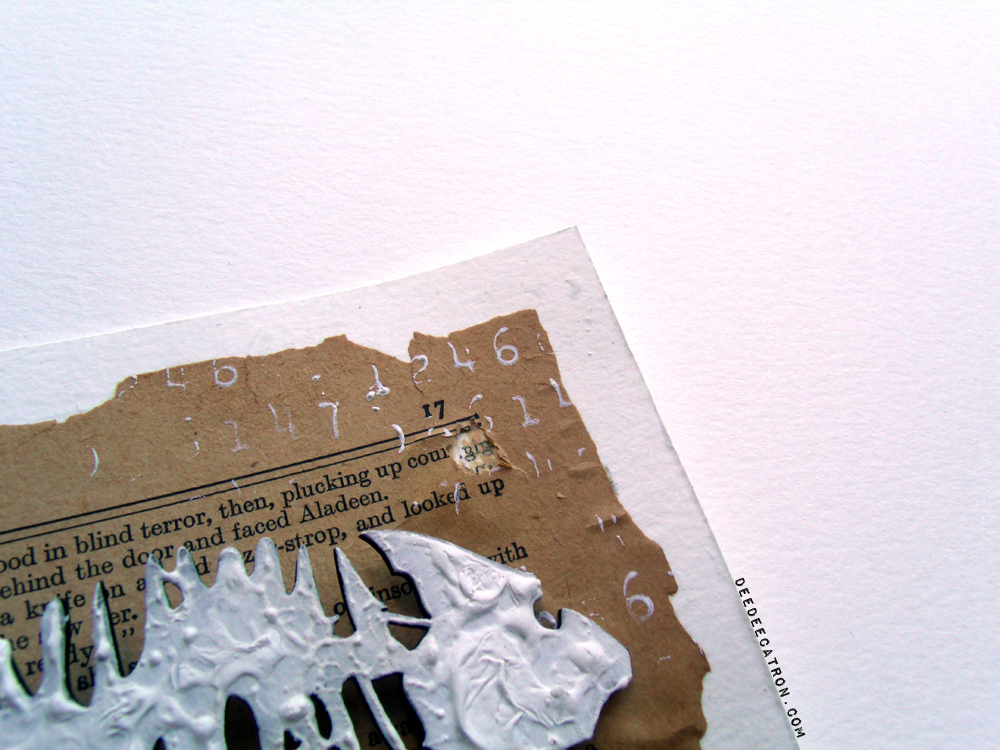
Then I took to stamping with the Numbers Set from Viva Las VegaStamps!. I spread out a nice thin gesso and dabbed my stamp into it. And I mean spread out.. like almost paper thin. This helps the paint mimic ink, but keeps the nice opacity of the gesso. I have yet to find a white ink I like and stamping in gesso never lets me down for a nice opaque image. 


The boney part of my card comes from the brand new FishBONES chipboard piece from UmWowStudio. It has such great attitude to it, I'm so glad it's in our collection for use! Rather than reaching for the same thin gesso I used to stamp in, I grabbed a heavier version and applied it in a super thick layer using my fingers to dab it on. It's a great way to create quick texture. Add a little heat from your heat gun and YUM. 


And then a little piece of a card was stamped with the Bone Dust stamp from VLVS!. This time I did stamp in ink -- Archival black by Ranger Ink. 


QUICK TIP : UmWowStudio's chipboard is so thick and sturdy... to get a little shape to it just dampen the back end with a baby wipe. Allow it to soak in and then bend every so slightly. Dampen again... bend a little more. It's a really great effect! Thanks so much for stopping by :)

I wanted to take a quick minute here and say thank you so much for all the comments about my thorough process descriptions! I invite you to stop by the other parts of my site to check out some of my online classes. ♥ They have even more description on mixed media tips, trick and techniques, PLUS are video based! Two classes per listing - $10 :)

and don't please forget about the other participants on this journey. Hop around, leave comments, and be entered to win:
Terra
Black Dragon
Alison
Julia
Lyneen
Kelli
Maureen
Sue
DominoART
Lost Coast Portal To Creativity
Susan
Sarah
Keren
Lisa F
Teresa
Fiona
Lisa H
Stampendous Stamps
Shell
Sarah S
Airless Chambers
Susan R
Dream In Darkness
De Stempelwinkel
Leslie Rahye
Kat
Rebecca
Lee
Suzi
Sara
DeeDee

Tuesday, October 6, 2015

Moon Beams - Day 6

Man -- I thought I made it to day 7 only to realize it's the sixth.. lol. :) I'm having a lot of fun trying to work up a new inspiring piece each night. Thanks for still being here! :) I am hopping with a big group of Halloween lovers via Smeared and Smudged to stamp for 31 (THIRTY ONE!) days. Today I'm revisiting some stamping on chipboard and texture building with this Moon Beams Wall Hanging.


Yum >>> So this project actually started out as something completely different. Who else can ever say THAT, right? haha. The base of the wall hanging which is actually that 3x4 gray card in the middle started out as a piece of Canson watercolor paper. It's been built upon with layers of gray acrylic (blick,) Liquitex glazing medium and Golden fluid acrylic in carbon black, and highlights of blick gesso. There's lots of layering paint down, heating with a heat tool (That's how you get the thick bubbly effect from the paint,) glazing, wiping, and more. 


The moon you may be familiar with --- it's the Man in the Moon chipboard piece from UmWowStudio. Today I used the same flat solid piece, but opted to stamp it with the Dictionary Page from Viva Las VegaStamps! in Archival black by Ranger Ink. Then, I layered the outline portion of the chipboard set right on top to create this really great layered frame effect. The two pieces have been glued together with a wet 2way glue by Elmer's. 


I really love (if you haven't noticed yet) using ephemera and neutrals.. so I opted to mat the piece in some super grungy old book text I have laying around. Thankfully I have a REALLY great local friend who loves old stuff just as much as me.. we tend to find great ephemera and other things, then share! Doubles our collections that way :) I also wanted a pop of color.. so chose a really great green Silk Ribbon from May Arts ribbon to hang the piece with. Moon Beams from Viva Las VegaStamps! was stamped in Archival black on white cardstock then cut apart and adhered down.


I'm always really inspired by other artists... I could seriously list about a million of them. Well just recently I fell in love with Tina Walker's loom work. I just love the whole overall feeling of it, and so I wanted to sort of replicate the fibrous nature of her weavings. I pulled out one of my favorite May Arts ribbons : the crocheted lace. I love to take a pair of scissors to it and really tatter up the edges... but leave the middle alone so that it still has a sort of "kept together" quality. It's been adhered in place between the card and background with wet glue, then adorned with little shaped pearl beads.


The End. <3 <3 Thanks for joining me again today! Let me know what you think of my wall hanging. I did a whole set of "ingredient" stamps that are very Halloweeny for VLVS! and so might do a series to hang up on the wall or in a frame for this time of year. Stay tuned!

and don't please forget about the other participants on this journey. Hop around, leave comments, and be entered to win:
Terra
Black Dragon
Alison
Julia
Lyneen
Kelli
Maureen
Sue
DominoART
Lost Coast Portal To Creativity
Susan
Sarah
Keren
Lisa F
Teresa
Fiona
Lisa H
Stampendous Stamps
Shell
Sarah S
Airless Chambers
Susan R
Dream In Darkness
De Stempelwinkel
Leslie Rahye
Kat
Rebecca
Lee
Suzi
Sara
DeeDee

Thursday, October 1, 2015

Final Notice - Altered Postcard

Hello hello friends old and new! :)

I have really stepped out of my comfort zone this Halloween season to be part of Smeared and Smudged's 31 days of Halloween. I do love Halloween, and I love stamping and getting inky... but forcing one finished-ready-to-show-the-world project out a day is going to be HARD for me. So naturally I signed right up! lol :) Here are all of the participating blogs :

Terra
Black Dragon
Alison
Julia
Lyneen
Kelli
Maureen
Sue
DominoART
Lost Coast Portal To Creativity
Susan
Sarah
Keren
Lisa F
Teresa
Fiona
Lisa H
Stampendous Stamps
Shell
Sarah S
Airless Chambers
Susan R
Dream In Darkness
De Stempelwinkel
Leslie Rahye
Kat
Rebecca
Lee
Suzi
Sara
DeeDee

And here is my first project for the hop - a postcard!:

I am VERY happy with my first little bit for this 31 days of intense stamping and I surely hope I can keep up with the good work! The postcard is 4x6 made of canson watercolor paper. It's been treated with Liquitex basic gesso and then collaged with tons of vintage ephemera and stamped tissue paper using Golden Matte Medium. Some of my favorite ephemera includes prescription cards, atlas coordinates, sheet music and book text. 


After the background was dry I used a thicker grade of gesso by Blick to sort of mute the background and help the edges blend together. The background really took on a sort of warm haunted glow because I had used this really great caramel colored tissue paper that a friend gave me. I'll have to bother her for some more! Then I did a bit of stamping with two of the stamps I've designed for Viva Las VegaStamps! : The Weathered Tree and the Cemetery. Both stamped in Archival Ink by Ranger. Along the bottom of the card I extended the tree stamp with a black PITT brush by Faber Castell.


Then I reached for my handy dandy trusty never musty UmWowStudio chipboard to add a little dimension. I used the Bat Confetti from last year's release to spice up the left of the card. At first I toyed with the idea of coloring the bats black, but I'm glad I didn't. The raw color of the chipboard really plays well into the warm sort of glow (mentioned earlier) that the card has. Once I saw and realized how powerful that was ending up, I grabbed another piece of chip from UmWowStudio...


...this one from our brand spanking new release, the Man in the Moon. He layers up so deliciously and really brought the whole piece together. Just a little wet glue keeps all my chipboard in place. Then I trimmed out a black mat and punched a Martha Stewart border punch along the bottom. The card has been stapled to the mat with Tim Holtz's tiny attacher. FINAL NOTICE is the sentiment on this piece and the sticker comes from one of my newest collections for 7 Dots Studio: Lost and Found.


WHEW- what a SLEW of information. Be sure to stop by and see everyone's work. There are also PRIZES to be won! :) Leave me some love and let me know what you think <3


Wednesday, August 19, 2015

Junk Journal Workshop {READY!!!!}

Ok ok ok ok OK >> So it has taken me a lot longer to get this baby under way than I had originally thought it would. But I say.. anything worth doing is worth doing RIGHT. And anything AWESOME is worth waiting for! 

SO I have finished up the last little tidbits for the Digital / Online JUNK JOURNAL WORKSHOP! 

The book itself is PERFECTO for a mini album, to store ephemera, to use as a memory saving book, to sketch in, around, alter, or art journal on. The possibilities are endless. ♥


The Workshop has over 90 minutes of instruction (in five separate videos) including creating the base, sewing on the cover and an inside pocket,  adding a closure or tie, creating signatures out of your favorite bits n pieces, how to make a folder insert and more. Included is a PDF with written details that accompany the recorded details via video. Lifetime access. 


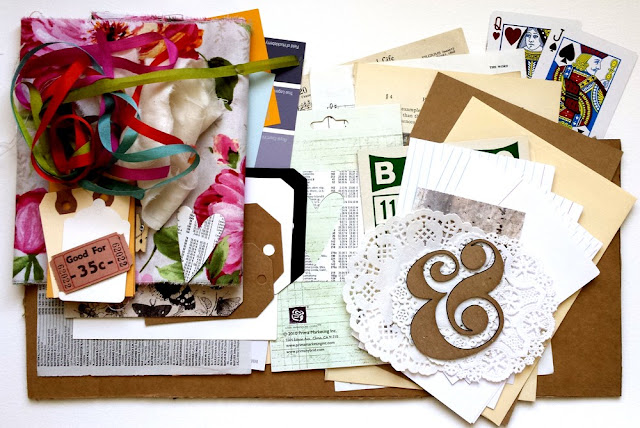
There's an optional $15 kit with /most/ of the supplies needed available in limited supply as well! Included are vintage ephemera book pages, music sheets, tags, doilies, the fabric needed to complete the book, the cardboard base, tickets, bingo cards, playing cards, envelopes, paint swatches and much more. 

I'm very excited to share this little bundle of joy with you. Some of the kind words that have been said about the class so far : 


“The great DeeDee Catron strikes again! What a wonderful junk journal class and great ladies today. Thank you DeeDee!”
DeeDee keeps a class engaged and entertaining. She’s sensitive to one on one needs when necessary and gives others the room they may need to experiment. LOVE taking instructions from DeeDee!!!!
“This was an awesome class and had lots of fun creating the junk journal. Lots of great ideas presented!”

Monday, May 4, 2015

Her Wings

I've got a post over on the VLVS! Blog today to inspire their fans to enter the monthly challenge.

I'm sharing this page I made using vintage ephemera, a Viva Las VegaStamps! stamp I designed ( Her Wings, ) some Golden Fluid acrylics and some Liquitex products:


There's a bit of mark making, fluid acrylic movement, finger painting (:D) and stamping. Here are some closeups for you to enjoy the texture and depth of this page: