Showing posts with label stamps. Show all posts

Sunday, August 20, 2017

Siren --- A Mixed Media Tag {Our Mixed Media Moods}

AAAAAAAAAAUGUST is here for Our Mixed Media Moods witches!


Jenn and I have been loving having fun with you. We adore sharing our experiences & knowledge with the world so when we had this idea it seemed perfect.. and IT IS!

Our Mixed Media Moods is a monthly collaboration between myself & Mixed Media Jenn where we pump up our youtube channels with high quality mixed media videos. Then.. we invite YOU to join us and link up below so we can visit your amazing responses! 


Occasionally we'll have some giveaways, prizes and guest artists joining us.. so please join our facebook group to see all the happenings! AND sign up for our newsletter for emails delivered directly to your inbox!

Whew... man I am so excited you guys! Should we dive into this month's mood board? 


Isn't it WONDERFUL?! 


Wednesday, June 21, 2017

LOST {ICAD 2017 #12}

Iiiiiiiiiiit's an ICAD!

Inspired by the beautiful colors Mixed Media Jenn always has in her projects AND accommodating the special request from Tracy <3 .. I've brought you a rainbow ICAD :)


Here's the video followed by closeups & the supply list:


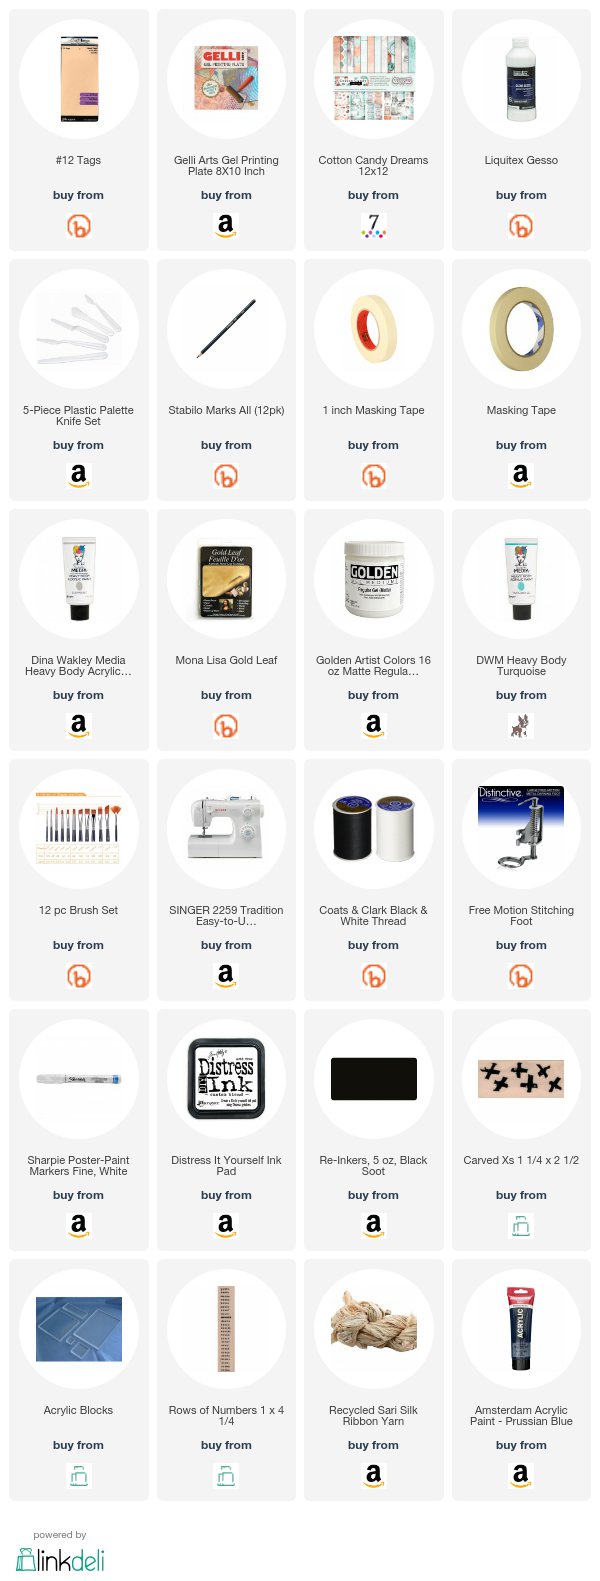
My supply lists will start looking a little different from here on out! No more cute little photos, but everything will be there with names & links! Thank you SO much to everyone who purchases through links -- those help support my hobby and educational videos!

Index Cards (3x5)
Liquitex Gesso
1" Simply Simmons Wash Brush
Ranger Heat It Tool
UmWowStudio Dahlia Mandala
Set of Palette Knives
Golden Heavy Gel Matte
Dina Wakley Media (by Ranger) Heavy Body Paint in Ruby, Blackberry, Teal, Lime, Lemon, Tangerine
Posca Paint Pen (black)
Dina Wakley Media Blank Tape
Tim Holtz Paper Dolls
Tim Holtz Ephemera pack : Thrift Shop
Stabilo Marks All
Sharpie White Water-based Paint Pen
Dina Wakley Media Textures Stamps
Black thread, scrap chipboard
7 Dots Studio Dreamscapes Word Sentiments

Wednesday, November 18, 2015

Immortality {A Tag}

REJECTED probably should have been the title of this blog post. BUT -- what can ya do? Just keep on trying :) I'm sharing a tag with you today that I had previously submitted for print to a magazine. Due to FULL FRONTAL NUDITY it has been rejected. 

It's cool.. it happens. it makes a little bit of sense. and it just gives me the opportunity to share it with you now! So here is my Immortality Among the Stars Tag -- you may sense a little bit of familiarity with this tag -- it was the inspiration for one of my pieces from the 31 days of stamping event. 


Mmm... sigh. I love this tag ♥ The base is a piece from my Lost and Found collection for 7 Dots Studio. I adore the line in all its vintage glory, and also because cutting a tag from those sheets requires very little manipulation to have a great background and or base.


I used my sewing machine to sew around the tag.. giving it a border of white and helping create a boundary. I really enjoy machine stitching on paper... two contrasting elements that work well together. I've used two stamps from Viva Las VegaStamps!. One designed by Mary Vogel Lozinak : Whimsical Tree Lady. The other by me : Film Strip. First I stamped the Film Strip on a scrap of white paper with Ranger Archival Ink... then I stamped the Whimsical Tree Lady twice.. once on the background of my tag in Ranger Archival Ink and embossed with WOW Embossing Powder, and then once on top of the film strip in Archival, making sure to mask off the reel holes of the strip.

The Tree Lady was then outlined in a Faber Castell / Design Memory Craft's Aquarelle Grip Watercolor pencil. I used a small paintbrush and some water to feather out the intensity of the pencil making a nice gradient of color around her. I trimmed out the film strip and popped it up using dimensional adhesive.


After the watercolor pencil was dry I used a PITT pen to draw circles around the girl, just adding a bit of contrast to the background while playing off the whimsy of her "hair." I also printed up a saying on some cardstock using my inkjet printer and glued it down with a UHU stick. The idea of the whole tag is that this beautiful voluptuous gal is forever immortalized in film.


And last but never least, the tag was finished off with a scatter of Star Confetti Chipboard from UmWowStudio. I left it in the natural raw kraft color to accent the vintage tones of the entire tag. I had a scrap of natural colored muslin laying on my desk that ended up being just the perfect touch to tie *pun intended* off my tag. Love when those little pieces fall together like that. 

♥♥

Friday, October 9, 2015

Skull Maggots - day 9

welcome to my day 9 Friends!

After seeing my Ingredient Cards laid together yesterday and sort of stewing over how I'll be presenting them as a whole, I thought it would be good to add in a few cards with a bit less dimension. Hopefully my layered heart can get over it! :) so where today's project might not be very technique and or labor intensive, I'm still excited to show you the fourth of my Ingredient Cards... SKULL MAGGOTS :


dun dun DUN!!!!!!!! I love how it turned out :) And I feel like it could be the front of some funky 80's SciFi novel or something! The base is, of course, Canson watercolor paper. It's been layered with a trimmed down piece of patterned paper from my Destination Unknown line for 7 Dots Studio.


The Destination Unknown paper was trimmed down and then stamped with the Waybill/Invoice Background from Viva Las VegaStamps!. It was stamped in Ranger archival black, but to tone it down I dabbed the stamp on the ink pad and then blotted it on some scrap paper so that I was stamping with a ghosted image on the card background. It gave the card a great worn look. Then it was machine sewn to the card. 


I stamped the Elegant Lady Face from Viva Las VegaStamps! on bristol board in Ranger's Archival ink and fussy cut her out. Then.. I chopped off the top of her head! lol. The Detailed Brain was stamped on that same vintage book text I've been using for the ingredient cards. I trimmed it out also, then tucked it behind my Vintage Lady so that her brains are now exposed.


I glued everything down and then finished the card with the Skull Maggots stamp from last year's Halloween release. The Bristol board is proving great for stamping and really seems to hold up to wet glue, too. Believe it or not.. no UmWowStudio on this card. Sad right? haha :) 

Also please don't forget about the other participants on this journey. Hop around, leave comments, and be entered to win:
Terra
Black Dragon
Alison
Julia
Lyneen
Kelli
Maureen
Sue
DominoART
Lost Coast Portal To Creativity
Susan
Sarah
Keren
Lisa F
Teresa
Fiona
Lisa H
Stampendous Stamps
Shell
Sarah S
Airless Chambers
Susan R
Dream In Darkness
De Stempelwinkel
Leslie Rahye
Kat
Rebecca
Lee
Suzi
Sara
DeeDee

Wednesday, October 7, 2015

Bone Dust - Day 7

Whoop! One week in :) After yesterday's super fun ingredient bit... I took my idea to make a series pretty seriously. So be prepared for some super cool but spooky Witch's ingredient cards! Today I've got for you the key ingredient to every devilish concoction... BONE DUST:


The base is Canson Watercolor paper with a layer of that delicious vintage book text from yesterday's post. It's so fragile you can see all around the edges where it just starts crumbling. It's such a great thing to have in my stash! the book text has been adhered down with Golden Fluid Matte Medium. Perfect to preserve the look and feel of the paper but make it more durable and useable in my mixed media piece.


Then I took to stamping with the Numbers Set from Viva Las VegaStamps!. I spread out a nice thin gesso and dabbed my stamp into it. And I mean spread out.. like almost paper thin. This helps the paint mimic ink, but keeps the nice opacity of the gesso. I have yet to find a white ink I like and stamping in gesso never lets me down for a nice opaque image. 


The boney part of my card comes from the brand new FishBONES chipboard piece from UmWowStudio. It has such great attitude to it, I'm so glad it's in our collection for use! Rather than reaching for the same thin gesso I used to stamp in, I grabbed a heavier version and applied it in a super thick layer using my fingers to dab it on. It's a great way to create quick texture. Add a little heat from your heat gun and YUM. 


And then a little piece of a card was stamped with the Bone Dust stamp from VLVS!. This time I did stamp in ink -- Archival black by Ranger Ink. 


QUICK TIP : UmWowStudio's chipboard is so thick and sturdy... to get a little shape to it just dampen the back end with a baby wipe. Allow it to soak in and then bend every so slightly. Dampen again... bend a little more. It's a really great effect! Thanks so much for stopping by :)

I wanted to take a quick minute here and say thank you so much for all the comments about my thorough process descriptions! I invite you to stop by the other parts of my site to check out some of my online classes. ♥ They have even more description on mixed media tips, trick and techniques, PLUS are video based! Two classes per listing - $10 :)

and don't please forget about the other participants on this journey. Hop around, leave comments, and be entered to win:
Terra
Black Dragon
Alison
Julia
Lyneen
Kelli
Maureen
Sue
DominoART
Lost Coast Portal To Creativity
Susan
Sarah
Keren
Lisa F
Teresa
Fiona
Lisa H
Stampendous Stamps
Shell
Sarah S
Airless Chambers
Susan R
Dream In Darkness
De Stempelwinkel
Leslie Rahye
Kat
Rebecca
Lee
Suzi
Sara
DeeDee

Friday, July 24, 2015

Your Wings Are Ready {Tag and video tutorial}

Hello hello hellooooo!

I am trying like hell to record more of my processes and get them up on youtube. At this point I'm still struggling with remembering to hit play and pause in all the right places. I also can't talk during the video due to my little guy, our dog, local noises, tvs and just a whole bunch of other things that never.work.out. It's ok though because it offers me the opportunity to voice over at a later date (usually very late at night whenever everyone is asleep, lol) and last night I got a little gutsy and went in search of some MUSIC to use in dead spots of the video. It makes me giddy :)

ANYWAYS >>> that's all to say that today's post includes a video tutorial basically from start to finish on a tag I made in duplicate for a tag swap that Viva Las VegaStamps! hosted in our facebook group.


I invite you now to watch the video tutorial


And following here are some closeup shots and product details.


The base is canson watercolor paper -- have you tired of me saying that yet? I love starting on watercolor paper because chances are I'm going to cover it up anyways. It's heavy, thick, and can withstand just about most things I throw at it. It's been layered with music note paper, Golden matte medium, Blick Gesso, drywall tape and two Viva Las VegaStamps! rubber stamps I've designed in Archival Ink by Ranger: Numbers Set and the Waybill/Invoice Background.


More layers : some craft acrylic paints with Liquitex Glazing Medium, another layer of Blick Gesso and some coffee staining. Tip : keep a bottle of instant coffee like you do other sprays and mists. I reach for it the most! It adds the greatest vintage tone to all my projects. The dress from is the brand new chipboard Wire Cage Dress Form from UmWowStudio; it's been covered in VerDay paints to achieve the delicious rust and sprayed with a  Krylon fixative to hold everything the paint in place.


The dress form is attached to the tag with a pamphlet stitch using some basic natural colored muslin. TIP : I always tear my fabrics for a little extra grunge. The Your Time As A Caterpillar sentiment from VLVS! sets the perfect tone for my entire tag; it's been stamped on plain white card with Archival Ink by Ranger (my go-to ink.) I glued it down with some basic Scotch two way adhesive.


And finally -- my little butterfly. It's been created by stamping the Small Gossamer Butterfly stamp from VLVS! on 3 different papers. They've been layered, sewn together, and adhered with Gel Medium to the knot on the muslin bow. To finish the tag I tied it with some May Arts Ribbon Silk in a carmel color. I adore the chunkiness / 3d aspect of my tag.. and really almost all my work ends up like this! Thank so much for joining me today -- let me know what you think :)


Wednesday, July 8, 2015

May Art Journaling -- catch up!

Hello Hello!

It may have taken me a little bit to get caught up but here are the two journal classes from May :)


The first class in May we concentrated on making stamps!! We did a bit of stamp cutting and carving out of different materials.


And the 2nd one from May was about using gesso, stencils and chipboard to create texture that you can then glaze over. YUM. I sent the class home with homework to come back with a finished page. The results were pretty awesome! I'm just gaga over the UmWowStudio chipboard stars layered on the UmWowStudio Star Confetti Stencil.

May's videos are available for purchase here :)

You can also join this Facebook Group to share your work based on the classes, or to just be inspired!

For whatever reason I didn't end up with any class photos for either of these workshops, boo!

Tuesday, June 9, 2015

New Collections!! ♥♥

I have new collections up @ 7 Dots Studio and UmWowStudio! <3 

The first is YULETIDE >> A big delicious christmasy mashup of vintage and modern icons and colors. Can't wait to get my dirty little fingers on this baby to create a december daily. 


 You can see Yuletide larger on my website here.


The second is Lost and Found --- a super delicious collection of vintage paper patterns and graphics. The colors speak to my soul and reach the depths of my heart.


You can see Lost And Found larger on my website here.

Thursday, June 4, 2015

Paint Stick Swap


Hello sweet sweet friends! I haven't posted in so long, and for that I am sorry. but I've been working on some really great things in the background and sometimes there just isn't a way to show them. 

I will be debuting two new paper lines for 7 Dots Studio along with coordinating embellishments from UmWowStudio in just a short few days!! 


I also DO have a few other Mixed Media projects to show you over the next couple of weeks, so that's great, too! 

I've been doing some filming behind the scenes to update classes and a million other things. 


BUT >>> For TODAY I get to share with you a really delicious Mixed Media project I just finished.... an Altered Paint Stick! I joined this Paint Stick Swap with a few other really talented ladies and you should definitely visit all the blogs today to see what they're up to. 

The full line up:


Truly the best part of this is how different and unique each piece turned out. We all started with the same thing... just plain ol' paint sticks from your local hardware store! Then we were encouraged to just.. DO 'EM UP! any way we wanted and that made us happy. No theme was given or anything... my sticks turned into this sort of Magical Night Sky themed little beauty:


Because we're each paying for postage to the designated destination, our sticks could be as heavy and 3D as we wanted.... and of course I love some dimension! 


The background for my sticks are several layers of goodness. I started by covering my sticks in Gesso. Any gesso will work if you're willing to put in the hours for extra coverage. I did two coats for the fronts of my sticks and a lighter single coat for the back. 


After both coats of gesso were dry, I applied a third, but this time through an UmWowStudio Star Confetti Stencil. It allowed me to really start bringing in the theme of my sticks and simultaneously start the dimension portion. Before that was completely dry I embedded some UmWowStudio Star Confetti Chipboard pieces into the gesso. Gesso itself is not an adhesive and shouldn't be used AS an adhesive... but if you're working in the background and are planning to build up some dimension WHILE working with gesso, it can certainly substitute. I just wouldn't recommend using it solely for adhesion. 


I let everything sit and REALLY dry, then I layered up some watercolor from my brand new Grumbacher pan set. The watercolor gave me a really great fluid base to build upon, and because I was already working with water based products I grabbed my Tim Holtz / Ranger Distress Stain Sprays and helped really add some night sky colors. I dabbed my chipboard stars with a bit o' gesso to help them stand out and sealed everything with a gloss acrylic sealer. The shine to these beauties mimics star shine :) 


Then it was just a bit o' layered! My little German Charlotte Dolls are vintage replicas. I picked up a set from an etsy shop a year or so ago, and them molded them with Amazing Mold Putty. Now whenever I want one (or four!) I just cast them in Amazing Casting Resin and I have as many as I need forever. The vintage ones sit on my shelf all pretty like. 

The wings have been stamped using a new stamp I designed for Viva Las VegaStamps! : Pair Of Butterfly Wings, and they've been stamped using Archival Ink by Ranger in black on my first paper line for 7 Dots Studio : Nature Walk. The frayed bit behind them is one of my favorite ribbons from May Arts Ribbon, crocheted lace, and to finish it all off there's a teeny tiny little paper doily by Doodlebug Designs I picked up from Paper Issues. My little fairy (as Gabe calls it) assemblage was put together with Prima Marketing / Finnabair's 3D Gel Medium.

What do you think? :) 
Thursday, January 1, 2015

A Mysterious Tale {Scrapki Art Journal Spread}

Whoop! It's reveal day at Scrapki-wyzwaniowo and I am SO EXCITED to share this bit with you! 


It's a double page art journal spread fitting into the theme of "A Tale of Mystery" :D so neat! I also needed to work inside a journal concentrated around the theme COLOR. They sounded like best friends to me. Here's the finished spread:


the left page!

 the right page!

 
The base is what came in the journal -- a nice heavy watercolor paper if I'm not mistaken :) There was a bit of pink paint on the bottom from a couple other pages that have been done in the journal -- I just went with it. They're very cool. The theme for this journal is COLOR -- and we're all sort of going in a rainbow theme with it, which is proving very cool. 


I prepped my pages by splattering and dropping Tim HOltz's newer Distress Stain Sprays up and down the edges of the spread. I used Picked Raspberries, Seedless Preserves, Broken China, Peacock Feathers, Crushed Olive, Mustard Seed and Spiced Marmalade.


The left page was layered up with bits of Old Atlas, washi tape, paper reinforcements, a button, a tag, some golden fluid acrylic through a fine liner and two Viva Las VegaStamps! Rubber Stamps : King Fisher and one of my new art journaling designs : Writing Circles Background.


The right page is built up with similar items.. reinforcements, atlas, washi tape. But I also used some old Metal Forge #s and a glorious shiny vintage ribbon. Everything on both pages has been secured down with Prima Marketing / Finnabair's Soft Matte Gel. On this page I also used a stamp from my Destination Unknown release by 7 Dots Studio.


And the final bit : A Mysterious Tale Awaits Any Who Dare♥♥ handwritten on watercolor paper and trimmed to play with their layout.